Many beginners (and even a few professionals) believe that the job of a photographer officially ends when the shutter is released. They've carefully composed a few scenes, exposed properly, and filled a roll of film (or memory card) with creatively captured images. All that's left is to send the film to a lab or print from the card and you're done. Right?
Well, if getting the most from your photos counts, then you're only half done. An artist wouldn't hand off his canvas sketch for someone else to paint, and a fine art photographer wouldn't trust his film negatives to a commercial lab.
In the past, great photographers labored in the darkroom to realize their vision. Today, thanks to image editing programs such as Photoshop or PaintShop Pro,
all the tools needed to refine, correct, and enhance a photograph are available to anyone who wants full creative control over his work.
In a previous article, we discussed
Basic Color Correction as being an important part of processing a photo to fix white balance errors. With digital photography, color correction, sharpening, or exposure adjustment is often needed to prepare an image for printing. Beyond these basic corrections, we move into the realm of
Post Processing, which is generally defined as image editing intended to refine or enhance a photograph.
Learning to use software like Photoshop is beyond the scope of this article, but we've asked our panel of judges to demonstrate just how important post processing can be. Using photos submitted by our members, we'll show with before and after examples how a few moments in an image editing program can dramatically improve a photograph.
Example 1
Here is Dino Dil's "Spiderthime1" as it was originally submitted. The spider is nicely captured, but could use more detail and a little something to grab the viewer.
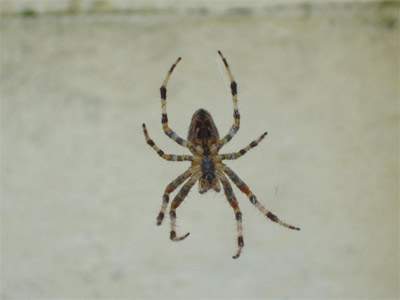 'Spiderthime1' (Before)
The original was brought into Photoshop and these steps taken:
1) Crop out more background
2) Adjust levels to bring up shadow detail
3) Increase contrast
4) Apply unsharp mask (sharpen)
5) Desaturate (convert to greyscale)
6) Apply "sepia" tint to warm the image
7) Burn the edges with a very gradual vignette to highlight the subject.
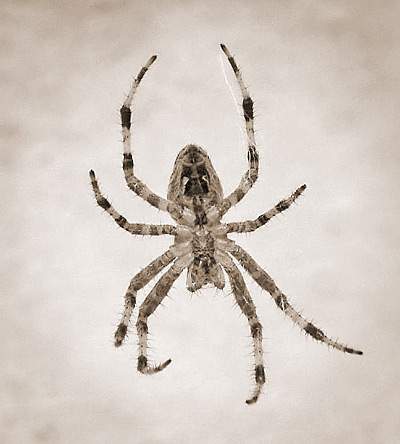 'Spiderthime1' (After)
(PP by Mark V) Example 2
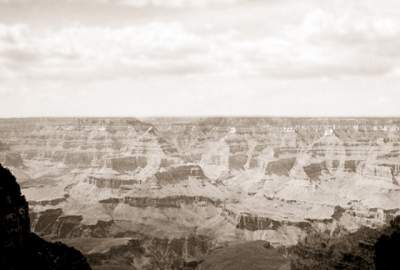
Kim & Furkids "Along the South Rim of the Grand Canyon" captures a beautiful view of the canyon, but just a few post processing steps improve the drama:
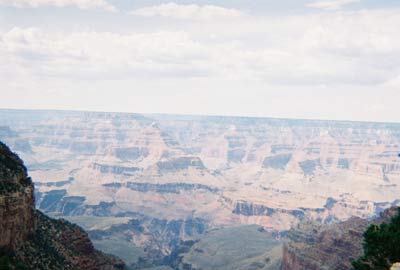 'Along the South Rim of the Grand Canyon' (Before)
 1) Straighten the horizon line with Transform -> Rotate
2) Adjust contrast to bring out the canyon area using curves
3) Select the sky portion, adjust blue channel and slightly blur
4) Desaturate the image to get B&W and adjust contrast
 'Along the South Rim of the Grand Canyon' (After)
(PP by Sarah H) Example 3
This colorful photo was taken in a darkened aquarium and includes somewhat distracting reflections off the glass of the tank.
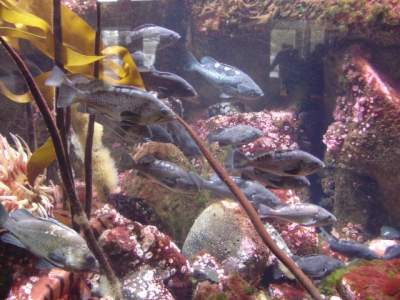 'Aquarium Fish' (Before)
 1) Duplicate layer and multiply
2) Paint out glare and reflections, clone to add back texture
3) Increase saturation on fish and rocks to make them stand out more
4) Burn edges about 25%
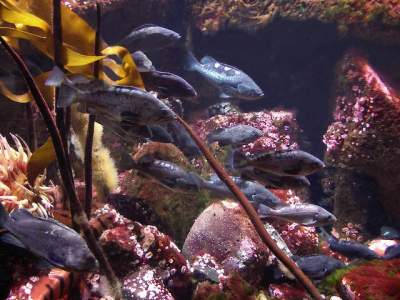 'Aquarium Fish' (After)
(PP by Cora M) Example 4
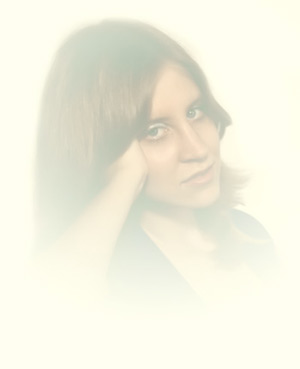
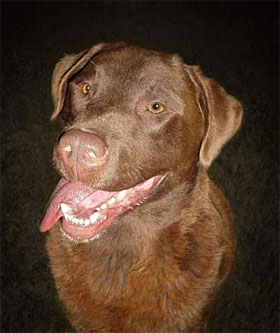
Theo's portrait of "Rebel" nicely captures the moment, but the flash shadow and glowing eyes detract from the photo.
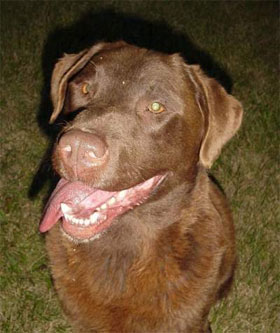 'The Rebel Rouser' (Before)
 1) Clone out the flash shadow
2) Darken background
3) Burn the edges
4) Enhance the eyes, keeping a bit of catch-light
 'The Rebel Rouser' (After)
(PP by Cora M)
The possibilities of post processing are endless and allow a creative photographer to dramatically alter the final version of a photo. Purists often argue that such editing falsifies or detracts from a photo, and this would certainly be true in photo-journalism or when the photographer is documenting an event or capturing a scene "as is".
Correcting errors in technique might also be an area where image editing is frowned upon, but if the artist is using post processing to enhance or realize his original vision of the image, then it should be considered an important tool in the photographer's arsenal.
As a final example, the photo below was taken at a crowded classic car show. Conditions prevented me from isolating the car from the crowds, so I spent some time in Photoshop selectively blurring the bystanders (but not the street scene), and then desaturating and sepia toning all but the car itself. The result was printed at 13"x 19" and pleased the client.
Example 5
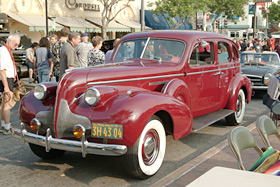 'Road Master' (Before)
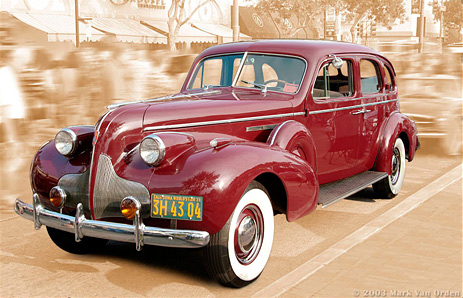
'Road Master' (After)
(PP by Mark V)
1/19/2007